How to Make Your Backyard More Eco-Friendly?
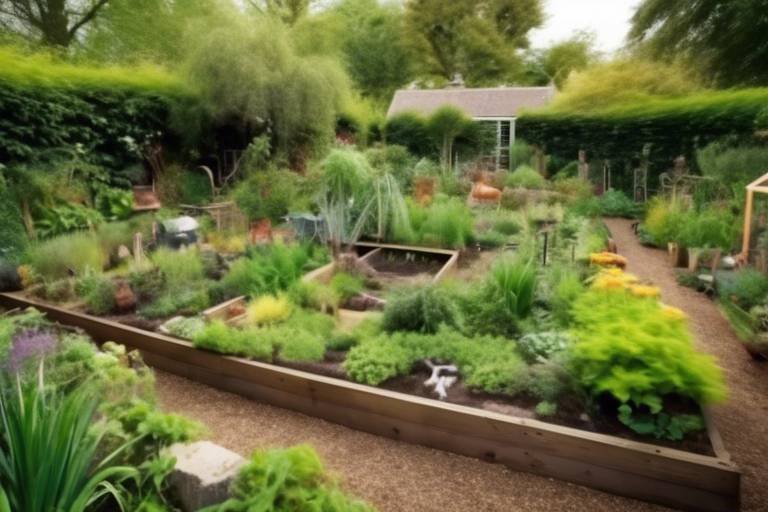
Transforming your backyard into an eco-friendly oasis is not only a fantastic way to contribute to the environment but also a rewarding project that you can enjoy for years to come. Imagine stepping into a lush, vibrant space where every plant thrives, every drop of water is cherished, and wildlife flutters about in harmony. Sounds dreamy, right? Well, it’s entirely possible with a little effort and creativity. In this article, we’ll explore practical tips and strategies that will help you create a sustainable backyard that promotes biodiversity and supports a healthier ecosystem for both you and local wildlife.
First off, let’s talk about the foundation of any eco-friendly garden: native plants. These are the unsung heroes of the gardening world, perfectly adapted to local climates and soil conditions. By choosing native flora, you'll not only reduce the need for excessive watering and maintenance but also provide a welcoming habitat for local wildlife. Native plants are like the local food trucks of the plant world—everyone loves them because they’re already familiar and suited to the area!
But it doesn’t stop there. Water conservation is another critical aspect of making your backyard eco-friendly. You might be surprised to learn that there are numerous techniques to reduce water usage while still keeping your garden lush and vibrant. For instance, collecting rainwater is an effective way to conserve water. Imagine harnessing the power of nature right in your backyard! Setting up a rainwater harvesting system can be as simple as installing a few rain barrels to catch the runoff from your roof. This not only saves water but also reduces stormwater runoff, which can carry pollutants into local waterways.
Speaking of rain barrels, let’s dive deeper into how to install and maintain them effectively. A rain barrel can be your garden's best friend. Just find a suitable spot near your downspout, connect the barrel, and watch it fill up during those lovely summer showers. It’s like having a personal water reserve! Plus, maintaining it is a breeze—just keep an eye on the overflow and clean it out occasionally to prevent algae growth.
Another fantastic method for water conservation is the drip irrigation system. This technique delivers water directly to the roots of your plants, minimizing waste and ensuring that every drop counts. Installing a drip irrigation system might sound complicated, but it’s more like putting together a puzzle—once you get the hang of it, it’s a piece of cake!
Now, let’s discuss a fun and rewarding way to reduce waste: composting. It’s a win-win situation! By composting organic waste, you not only keep it out of landfills but also create nutrient-rich soil for your garden. Imagine turning kitchen scraps into black gold for your plants! Starting a compost bin is simple; all you need is a designated spot in your backyard, a mix of green (nitrogen-rich) and brown (carbon-rich) materials, and a little patience. Soon enough, you’ll have a rich compost that your plants will love.
When it comes to composting, there are several methods to choose from, such as traditional composting, vermicomposting (using worms), and bokashi composting (a fermentation process). Each method has its pros and cons, so you can pick one that suits your lifestyle and space. Want to know how to use that compost? Just mix it into your garden beds or sprinkle it around your plants. They’ll thank you with vibrant growth and resilience!
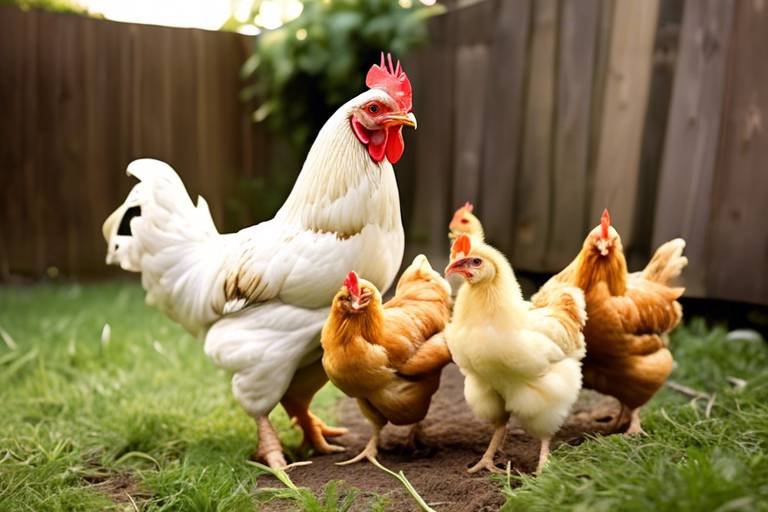
Creating wildlife habitats in your backyard is another wonderful way to promote biodiversity. Think of your backyard as a mini sanctuary for birds, insects, and other critters. You can attract wildlife by building birdhouses and feeders, which serve as cozy homes and dining spots for various bird species. Just imagine sipping your morning coffee while watching colorful birds flit about! Additionally, planting a pollinator garden filled with flowers that attract bees and butterflies is a fantastic way to support these essential insects. It’s like throwing a party for nature!
Lastly, reducing chemical use in your backyard is vital for maintaining a healthy ecosystem. Instead of reaching for those harsh pesticides and fertilizers, consider natural alternatives. There are many effective natural pest control methods that can help keep your plants healthy without harming beneficial insects. For example, introducing ladybugs can help manage aphid populations, and using neem oil can deter pests without the toxic side effects. And when it comes to fertilizers, organic options like compost or well-rotted manure enrich your soil without synthetic additives.
By implementing these eco-friendly practices, you’ll not only create a beautiful backyard but also contribute positively to the environment. It’s all about making small changes that lead to significant impacts. So, why wait? Start transforming your outdoor space into a sustainable haven today!
- What are native plants? Native plants are species that naturally grow in a specific region without human intervention. They are well-adapted to the local climate and soil conditions.
- How can I collect rainwater? You can collect rainwater by installing rain barrels at your downspouts to capture runoff from your roof.
- What is composting? Composting is the process of recycling organic waste, such as kitchen scraps and yard waste, into nutrient-rich soil.
- How do I attract wildlife to my backyard? You can attract wildlife by providing food sources, water, and shelter, such as birdhouses, feeders, and native plants.
- What are organic fertilizers? Organic fertilizers are natural materials used to enrich soil, such as compost, manure, or bone meal, without synthetic chemicals.

Choosing Native Plants
When it comes to creating an eco-friendly backyard, one of the most impactful choices you can make is selecting native plants. These plants are naturally adapted to your local environment, which means they thrive in your specific climate and soil conditions. By choosing native flora, you're not just enhancing your garden's beauty; you're also making a significant contribution to sustainability. Imagine your backyard as a mini-ecosystem, where every plant plays a role in supporting local wildlife and conserving resources.
Native plants require less water and maintenance than non-native species. This is because they have evolved alongside local weather patterns and soil types, making them more resilient to droughts and pests. For example, consider how a native wildflower can flourish in your garden without the need for constant watering or chemical fertilizers. This not only saves you time and effort but also reduces your environmental footprint.
Furthermore, native plants provide essential habitats for local wildlife. Birds, butterflies, and beneficial insects depend on these plants for food and shelter. By planting a variety of native species, you can create a vibrant ecosystem right in your backyard. For instance, a mix of flowering plants can attract pollinators, while shrubs can offer nesting sites for birds. It's like throwing a party for nature, where every guest feels welcome!
Here are some key benefits of choosing native plants for your eco-friendly backyard:
- Low Maintenance: Once established, native plants require less care, saving you time and resources.
- Water Efficiency: These plants are adapted to the local climate, often needing less water than non-natives.
- Biodiversity Support: Native plants help sustain local wildlife populations, promoting a balanced ecosystem.
- Soil Health: Their root systems improve soil structure and prevent erosion.
To get started, research which native plants thrive in your region. Local extension services or native plant societies can provide valuable insights. You might be surprised by the variety of options available! From vibrant wildflowers to sturdy shrubs, there's a native plant for every corner of your backyard.
In conclusion, choosing native plants is a simple yet powerful way to transform your backyard into an eco-friendly haven. Not only will you enjoy a beautiful garden, but you'll also be contributing to the health of your local environment. So, why not take the plunge and embrace the natural beauty that native plants offer? Your backyard—and the wildlife that calls it home—will thank you!

Water Conservation Techniques
When it comes to creating an eco-friendly backyard, water conservation is not just a good idea; it's essential. Every drop counts, and implementing effective water-saving methods can make a significant difference in how lush and vibrant your garden can be. Imagine a garden that thrives without the constant need for excessive watering—sounds dreamy, right? Well, with the right techniques, you can turn that dream into reality!
First off, let's talk about the importance of water conservation. Not only does conserving water help to reduce your utility bills, but it also plays a crucial role in protecting our precious ecosystems. By using less water, you're helping to ensure that local wildlife has enough resources to thrive. Plus, less water usage means less runoff, which can carry pollutants into nearby streams and rivers. So, what are some practical techniques you can implement?
One of the most effective methods is rainwater harvesting. This involves collecting rainwater from your roof and directing it into storage containers, such as rain barrels. By doing this, you can utilize natural precipitation to water your garden, reducing your reliance on municipal water systems. Setting up a rainwater harvesting system is easier than you might think! You can start with just a few simple materials:
| Materials Needed | Purpose |
|---|---|
| Rain Barrel | To collect rainwater |
| Downspout Diverter | To redirect rainwater from your roof |
| Screen | To filter debris from the water |
Another fantastic way to conserve water is by creating a rain garden. A rain garden is designed to capture and absorb runoff from impervious surfaces like driveways and roofs. By planting native plants in a depression, you can allow rainwater to soak into the ground rather than flowing away. Not only does this help with water conservation, but it also filters pollutants and provides a habitat for local wildlife.
Additionally, consider installing a drip irrigation system. This method delivers water directly to the roots of your plants, minimizing evaporation and runoff. It’s like giving your plants a refreshing drink without wasting a single drop! Drip irrigation systems can be set up in a variety of ways, allowing you to tailor them to your garden's specific needs. Plus, they can be automated, making it even easier to ensure your plants get the right amount of water at the right time.
Now, you might be wondering, "How can I measure the effectiveness of these water conservation techniques?" A simple way to track your water usage is by keeping a journal. Record your water bills, the amount of rainwater collected, and how your plants respond to these changes. This can help you see the impact of your efforts and motivate you to continue improving your eco-friendly practices.
Incorporating these into your backyard not only helps you save money but also contributes to a healthier environment. So, are you ready to get started? Your garden will thank you, and so will the planet!

Rainwater Harvesting
Rainwater harvesting is not just a trendy buzzword; it's a practical and sustainable method to collect and utilize one of our most precious resources—water. Imagine transforming your backyard into a thriving ecosystem while simultaneously reducing your water bills. Sounds appealing, right? By setting up a rainwater harvesting system, you can capture rainwater from your roof and direct it into barrels or cisterns for later use in your garden. This method not only conserves water but also decreases runoff, which can lead to erosion and pollution in local waterways.
To get started, you'll need a few essential components. First, consider the size of your roof and the average rainfall in your area to determine how much water you can realistically collect. A simple system typically includes:
- A collection surface (like your roof)
- Gutters to channel the water
- A downspout that leads to your storage container
- A storage tank or rain barrel
- A filtration system to keep debris out
Installing a rainwater harvesting system can be a fun DIY project. Start by ensuring your gutters are clean and free of blockages. Then, attach a downspout diverter that will direct the water into your rain barrel. Choose a barrel that is made of food-grade plastic or another non-toxic material to ensure the water remains safe for use. You might also consider adding a screen on top of the barrel to prevent mosquitoes from breeding and to keep leaves and debris out.
Once your system is set up, the benefits become evident. You can use harvested rainwater for watering your garden, washing your car, or even flushing toilets. Just imagine the satisfaction of knowing that you are using water that would otherwise go to waste! Additionally, this practice contributes to a more sustainable lifestyle, as it reduces the demand on municipal water sources and helps mitigate the impact of droughts.
But wait, there’s more! If you want to take your rainwater harvesting to the next level, consider creating a rain garden. This is a specially designed garden that captures and absorbs rainwater runoff from impervious surfaces like driveways and roofs. By planting native plants in your rain garden, you can further enhance biodiversity while filtering pollutants from the water before it reaches the groundwater.
In conclusion, rainwater harvesting is a simple yet effective way to make your backyard more eco-friendly. Not only does it save water, but it also encourages a healthier environment for plants and wildlife alike. So why not take the plunge and start your rainwater harvesting journey today? Your garden—and the planet—will thank you!

Installing Rain Barrels
Installing rain barrels is a fantastic way to conserve water while also creating a sustainable ecosystem in your backyard. Not only do these barrels collect rainwater, but they also help reduce runoff and prevent erosion. So, how do you get started? It’s simpler than you might think!
First, you'll want to choose the right location for your rain barrel. Ideally, it should be placed under a downspout from your roof to efficiently capture rainwater. A spot that gets plenty of rainfall and is easily accessible for watering your plants is perfect. Once you have your location, it’s time to gather your materials.
Here’s a quick list of what you’ll need:
- A rain barrel (you can buy one or repurpose a large container)
- A downspout diverter or a simple connector
- A fine mesh or screen to keep debris and insects out
- Optional: a spigot for easy access to the water
Next, prepare your rain barrel. If you’re using a repurposed container, make sure it’s clean and free from any harmful chemicals. If your barrel doesn’t already have a spigot, you can drill a hole near the bottom and install one. This will make it much easier to access the water when you need it.
Now, let’s talk about connecting the barrel to your downspout. If you’re using a downspout diverter, follow the manufacturer’s instructions to ensure a proper fit. If you’re going the DIY route, you can cut the downspout and attach a flexible hose that leads directly into your barrel. Just make sure that the connection is secure to prevent any leaks!
Once your rain barrel is in place, it’s essential to cover the top with a fine mesh screen. This will act as a barrier to keep out leaves, debris, and pesky insects. Plus, it helps prevent algae growth, ensuring that your collected water stays clean and usable.
Finally, don’t forget to maintain your rain barrel! Regularly check for any debris that may accumulate on the screen and clean it out as necessary. It’s also a good idea to check the spigot for leaks and ensure that the barrel is in good condition, especially before the rainy season.
By installing a rain barrel, you’re not just saving water; you’re also taking a significant step toward creating a more eco-friendly backyard. Imagine the satisfaction of watering your garden with rainwater, knowing that you’re doing your part to protect the environment!
Q: How much water can a rain barrel hold?
A: Most rain barrels hold between 50 to 100 gallons of water, depending on their size. Larger barrels can be connected together for even more storage!
Q: Can I use rainwater for drinking?
A: While rainwater can be collected for irrigation and other non-potable uses, it’s essential to check local regulations and guidelines regarding the use of rainwater for drinking, as it may require additional filtration and treatment.
Q: What should I do in the winter?
A: In colder climates, it’s best to empty and store your rain barrel during the winter months to prevent freezing and cracking. Make sure to clean it before putting it away!

Creating a Rain Garden
Creating a rain garden is not just an eco-friendly choice; it’s like giving your backyard a beautiful facelift while helping the environment at the same time. Imagine a vibrant space that not only looks good but also plays a significant role in managing stormwater runoff. Rain gardens are designed to collect and absorb rainwater, allowing it to filter through the soil and recharge groundwater supplies. This process reduces flooding and erosion, providing a natural solution to water management.
To get started, you’ll need to choose a suitable location for your rain garden. Ideally, this spot should be at least 10 feet away from your home’s foundation to prevent water from seeping into your basement. Look for areas where water naturally pools or where downspouts direct water flow. Once you’ve identified the perfect spot, it’s time to plan the size and shape of your garden. A typical rain garden can range from 100 to 300 square feet, depending on the amount of runoff you expect.
Next, you’ll want to dig out the area to create a shallow depression. This will help capture rainwater effectively. The depth of the garden should be around 6 to 12 inches, depending on your soil type. For instance, sandy soils drain quickly, while clay soils hold water longer. If your soil is heavy clay, consider adding a layer of sand or gravel at the bottom to improve drainage. Once you’ve shaped your garden, it’s time to think about the plants that will thrive in this environment.
When selecting plants for your rain garden, opt for native species that are well-adapted to your local climate. Native plants not only require less maintenance but also provide essential habitats for local wildlife. Here are a few examples of plants that work wonderfully in rain gardens:
- Black-eyed Susans - Bright and cheerful, these flowers attract pollinators.
- Blue Flag Iris - With beautiful blooms, they thrive in wet conditions.
- Joe Pye Weed - A tall plant that adds height and attracts butterflies.
After planting, it’s crucial to mulch the area to retain moisture and suppress weeds. Organic mulch, such as wood chips or shredded bark, works best as it breaks down over time and enriches the soil. Regular maintenance is also essential; you’ll want to keep an eye out for invasive species and ensure your plants are healthy. Over time, your rain garden will not only contribute to a healthier ecosystem but also become a stunning focal point in your backyard.
In essence, creating a rain garden is like crafting a mini-ecosystem that benefits both you and the environment. It’s a small step that can lead to significant changes, promoting sustainability and enhancing the beauty of your outdoor space. So, why not take the plunge and transform that corner of your yard into a thriving rain garden?
1. What is a rain garden?
A rain garden is a planted depression that allows rainwater runoff from impervious surfaces like roofs, driveways, and sidewalks to be absorbed. It helps to filter pollutants and recharge groundwater.
2. How do I know if my soil is suitable for a rain garden?
Test your soil by digging a hole about 12 inches deep and filling it with water. If the water drains within 24 hours, your soil is suitable for a rain garden. If it takes longer, consider amending your soil for better drainage.
3. Can I use non-native plants in my rain garden?
While you can use non-native plants, it’s best to choose native species as they are adapted to local conditions, require less maintenance, and support local wildlife.
4. How often should I maintain my rain garden?
Regular maintenance includes checking for invasive species, replacing dead plants, and ensuring proper drainage. Initially, you may need to maintain it more frequently, but once established, it requires less attention.

Drip Irrigation Systems
When it comes to watering your garden, efficiency is key. That's where come into play. Unlike traditional methods that waste a lot of water, drip irrigation delivers moisture directly to the roots of your plants. Imagine a gentle rain falling just where it’s needed—this system mimics that natural process, ensuring your plants thrive while conserving water. It’s like giving your plants a personalized spa day every time they need a drink!
Setting up a drip irrigation system might sound daunting, but it’s simpler than you think. You start with a mainline that connects to your water source. From there, smaller tubes branch off, leading to your plants. This targeted approach means you’re not just watering the dirt; you’re nourishing the roots where it counts. Plus, because the water is delivered slowly, it reduces runoff and evaporation, making it an eco-friendly choice that benefits both your garden and the environment.
One of the greatest advantages of drip irrigation is its adaptability. Whether you have a small flower bed or a sprawling vegetable garden, you can customize your system to fit your needs. You can even use a timer to automate watering, ensuring your plants receive consistent moisture without any effort on your part. Imagine being able to go on vacation without worrying about your garden wilting away—now that’s peace of mind!
Here’s a quick overview of the main components you’ll need to set up your own drip irrigation system:
| Component | Description |
|---|---|
| Mainline Tubing | The primary line that connects to your water source and distributes water to the rest of the system. |
| Emitter Tubes | Smaller tubes that deliver water directly to the base of each plant. |
| Connectors | Used to join different sections of tubing together. |
| Filtration System | Prevents debris from clogging the emitters, ensuring a smooth flow of water. |
| Timer | Automates the watering schedule, so your plants are watered consistently. |
In addition to being water-efficient, drip irrigation systems can also help you manage your garden's nutrient levels. By applying water directly to the roots, you can mix in organic fertilizers or compost tea, giving your plants a nutrient boost while minimizing waste. It’s like feeding your plants a gourmet meal right at their doorstep!
In conclusion, investing in a drip irrigation system is a win-win for any eco-conscious gardener. Not only do you save water and reduce your environmental footprint, but you also create a thriving garden that flourishes with minimal effort. So why not take the plunge and transform your watering routine? Your plants will thank you, and so will the planet!
- How much water can I save with a drip irrigation system? Drip irrigation can save up to 50% more water compared to traditional sprinkler systems.
- Can I install a drip irrigation system myself? Absolutely! Many kits are available for DIY installation, and they come with easy-to-follow instructions.
- What types of plants benefit most from drip irrigation? Almost all plants benefit, especially those that require consistent moisture, such as vegetables, flowers, and shrubs.
- Do I need to water my garden every day with a drip system? Not necessarily. The frequency depends on your climate and the specific needs of your plants.

Composting Organic Waste
Composting organic waste is one of the most rewarding practices you can adopt in your eco-friendly backyard. Not only does it help in reducing the amount of waste that ends up in landfills, but it also transforms your kitchen scraps and garden debris into nutrient-rich soil that can significantly enhance your garden's health. Imagine turning banana peels, coffee grounds, and yard trimmings into black gold for your plants! It’s like giving your garden a superfood boost.
To get started with composting, you don't need a lot of fancy equipment or a massive backyard. A simple compost bin or even a designated corner in your yard can work wonders. The basic idea is to create a balanced mix of 'greens' (nitrogen-rich materials) and 'browns' (carbon-rich materials). This balance is crucial for the composting process to thrive. Greens include items like vegetable scraps, grass clippings, and coffee grounds, while browns encompass dried leaves, cardboard, and straw. By mixing these materials, you will create a thriving ecosystem that accelerates decomposition.
One of the key benefits of composting is that it enriches the soil with essential nutrients, which can lead to healthier plants and a more productive garden. Compost improves soil structure, enhances moisture retention, and encourages beneficial microorganisms. When you incorporate compost into your garden, you're not just feeding your plants; you're also fostering a vibrant ecosystem that supports life. To illustrate, research shows that gardens amended with compost can yield up to 25% more produce than those without!
Now, you might be wondering, "How do I start composting?" Well, here’s a straightforward process to guide you:
- Choose a Compost Bin: You can buy one or easily make your own from wood pallets or wire mesh.
- Add Materials: Start layering your greens and browns. Aim for a ratio of about 1 part greens to 3 parts browns.
- Maintain Moisture: Your compost should be as damp as a wrung-out sponge. If it’s too dry, add some water; if it’s too wet, add more browns.
- Turn the Pile: Every few weeks, turn your compost to aerate it, which speeds up the decomposition process.
- Harvest Your Compost: After a few months, your compost will be dark, crumbly, and earthy-smelling, ready to enrich your garden!
As you embark on this composting journey, remember that patience is key. The process takes time, but the results are well worth the wait. You'll be amazed at how much waste you can divert from landfills while simultaneously creating a sustainable resource for your garden. Plus, composting is a fantastic way to teach kids about sustainability and the environment, making it a family-friendly activity!
Q: Can I compost meat and dairy products?
A: It's best to avoid composting meat and dairy, as they can attract pests and create odors. Stick to plant-based materials for a more manageable composting experience.
Q: How long does it take for compost to be ready?
A: Depending on the materials and conditions, compost can take anywhere from a few weeks to several months to fully decompose. Regularly turning the pile can speed up the process.
Q: What can I do if my compost smells bad?
A: A smelly compost pile often indicates an imbalance. If it’s too wet or has too many greens, add more browns and turn the pile to aerate it.

Types of Composting
Composting is an essential practice for anyone looking to create an eco-friendly backyard, and it comes in various forms, each suited to different needs and lifestyles. Understanding the different types of composting can help you choose the best method for your garden and ensure that you’re effectively recycling organic waste. Let's dive into the three most popular composting methods: traditional composting, vermicomposting, and bokashi composting.
Traditional Composting is the most common method, and it involves creating a compost pile or bin where you layer organic materials such as kitchen scraps, yard waste, and other biodegradable items. This method is great for those with ample outdoor space, as it allows for a larger volume of compost. The process relies on microorganisms and worms to break down the materials, which usually takes anywhere from a few months to a year, depending on the conditions. To optimize your compost pile, it's important to maintain a balance of 'greens' (nitrogen-rich materials) and 'browns' (carbon-rich materials). Here’s a quick look at the pros and cons:
| Pros | Cons |
|---|---|
| Produces nutrient-rich compost | Requires space and maintenance |
| Can handle large volumes of waste | Longer decomposition time |
| Encourages beneficial microorganisms | Can attract pests if not managed properly |
Vermicomposting is a fun and efficient way to compost, especially for those with limited space. This method uses red wiggler worms to break down organic matter quickly. You can set up a worm bin indoors or outdoors, making it a versatile option. Vermicomposting can produce compost in as little as a few weeks, and the result is a rich fertilizer known as worm castings. This method is particularly great for those who enjoy gardening but may not have the time or space for traditional composting. However, it does require some initial investment in a worm bin and the worms themselves.
Bokashi Composting is a lesser-known method that involves fermenting organic waste using a special bran inoculated with beneficial microorganisms. This method is unique because it allows you to compost meat and dairy products, which are typically not suitable for traditional composting. The bokashi process takes about two weeks, and once the waste is fermented, it can be buried in the ground or added to a traditional compost pile to continue breaking down. It's a fantastic option for those who want to maximize their composting efforts and reduce waste.
Each composting method has its unique advantages and challenges. When choosing one, consider factors such as your available space, the types of waste you want to compost, and how much time you can dedicate to the process. By selecting the right composting method for you, you can significantly contribute to reducing waste and enriching your garden soil.
Q: Can I compost meat and dairy?
A: Traditional composting typically does not allow meat and dairy due to the attraction of pests. However, bokashi composting can handle these materials.
Q: How long does it take for compost to be ready?
A: It can take anywhere from a few weeks to a year, depending on the composting method and conditions. Vermicomposting is usually the fastest.
Q: What should I not compost?
A: Avoid composting oils, meats, dairy, and diseased plants, as they can create odors or attract pests.
By understanding the different types of composting, you can make informed choices that benefit your garden and the environment. Happy composting!

Using Compost in Your Garden
Incorporating compost into your garden is like giving your plants a delicious, nutrient-rich meal that they can’t resist! Compost not only enriches the soil but also improves its structure, helping it retain moisture and nutrients. When you mix compost into your garden beds, you’re essentially creating a thriving ecosystem that supports healthy plant growth. But how do you effectively use compost to reap these benefits? Let’s dive into the details!
First off, it’s important to understand that compost should be added to your garden at specific times. The best time to mix compost into your soil is during the spring before you plant your annuals or in the fall to prepare your garden for the next growing season. This timing allows the nutrients to integrate into the soil and become available to your plants when they need them the most.
When applying compost, aim for a layer thickness of about 2 to 4 inches. You can either spread it evenly across the surface of your garden beds or mix it into the top few inches of soil. If you have a vegetable garden, compost can be especially beneficial as it provides essential nutrients that promote healthy growth and increase yield. Just imagine biting into a juicy tomato or crisp lettuce that you grew with your own compost!
Another fantastic way to utilize compost is through the technique known as side dressing. This involves adding compost to the soil around established plants during the growing season. It’s like giving your plants a little boost when they need it! Simply create a small trench around the base of the plant, fill it with compost, and gently cover it with soil. This method not only feeds the plants but also helps suppress weeds and retains moisture.
Don’t forget about your compost tea! This liquid fertilizer is made by soaking compost in water. It’s a great way to provide a quick nutrient boost to your plants. Just steep some compost in a bucket of water for a few days, strain the mixture, and use it to water your plants. They’ll absolutely love you for it!
To give you a clearer picture, here’s a simple comparison of the effects of using compost versus synthetic fertilizers:
| Aspect | Compost | Synthetic Fertilizers |
|---|---|---|
| Nutrient Release | Slow and steady | Fast and often overwhelming |
| Soil Health | Improves soil structure and biodiversity | Can degrade soil health over time |
| Environmental Impact | Eco-friendly | Potentially harmful |
In summary, using compost in your garden is a game-changer. Not only does it enhance the soil and promote plant health, but it also contributes to a more sustainable gardening practice. So, the next time you’re out in your backyard, remember to give your plants that extra love with compost! They’ll thank you with vibrant blooms and bountiful harvests.
- How often should I apply compost? It’s best to apply compost at least once a season, but you can also do side dressing during the growing season for an extra boost.
- Can I use compost for all types of plants? Yes! Compost is beneficial for flowers, vegetables, and even shrubs and trees.
- Is there a difference between homemade compost and store-bought compost? Homemade compost can be tailored to your specific needs and often has a wider variety of nutrients, while store-bought compost is convenient and consistent.

Creating Wildlife Habitats
Creating a wildlife habitat in your backyard is not just a noble endeavor; it's a vital step towards promoting biodiversity and ensuring that local ecosystems thrive. Imagine your backyard as a mini-ecosystem, where every plant, shrub, and tree plays a role in supporting various forms of life. By making a few thoughtful changes, you can turn your outdoor space into a sanctuary for birds, insects, and other wildlife. Not only does this enhance the beauty of your surroundings, but it also contributes to a healthier environment. So, how can you create these habitats? Let’s dive into some practical strategies!
First and foremost, consider the types of plants you choose. Native plants are particularly important because they are adapted to your local climate and soil conditions, requiring less water and maintenance while providing food and shelter for local wildlife. When selecting plants, think about a variety of species that bloom at different times throughout the year to provide a continuous food source for pollinators and other creatures. You can create a vibrant tapestry of colors and textures that not only pleases the eye but also supports the local ecosystem.
In addition to native plants, incorporating features like birdhouses and feeders can significantly enhance your backyard's appeal to wildlife. Building birdhouses is a fun DIY project that can attract various bird species, each with its own unique behaviors and songs. When placing these houses, consider the orientation and height; they should be positioned away from predators and in areas that offer some cover. Feeders, on the other hand, can be stocked with seeds that attract local birds, providing them with a reliable food source, especially during harsh weather conditions.
Another fantastic way to support wildlife is by creating a pollinator garden. These gardens are specifically designed to attract bees, butterflies, and other essential pollinators. You might wonder, why are pollinators so important? Well, they play a crucial role in the reproductive processes of many plants, including those that produce fruits and vegetables. By planting a variety of nectar-rich flowers, such as coneflowers, milkweed, and sunflowers, you can create a buzzing hub of activity right in your backyard. Not only will this support local pollinator populations, but it will also enhance the productivity of your garden!
Water features can also be a wonderful addition to your wildlife habitat. A small pond or birdbath provides a vital source of water for birds and other creatures, especially during dry spells. Ensure that the water is fresh and clean, and consider adding pebbles or stones to the bottom to give birds a safe place to land. You might even attract frogs and dragonflies, which are beneficial for controlling pests in your garden.
Lastly, think about how you manage your yard. Reducing lawn areas and allowing some parts to grow wild can create natural habitats for various species. Leaving fallen leaves and logs in your garden can provide shelter for insects and small mammals. This approach not only supports wildlife but also reduces the need for chemical fertilizers and pesticides, creating a healthier environment overall.
In conclusion, creating wildlife habitats in your backyard is a rewarding journey that fosters a connection with nature. By implementing these strategies, not only will you enhance your outdoor space, but you’ll also contribute to the well-being of your local ecosystem. Remember, every small change counts, and your backyard can become a thriving haven for wildlife. So, roll up your sleeves and get started on this exciting project!
- What are the best native plants to attract wildlife? Native plants vary by region, but common choices include coneflowers, asters, and black-eyed Susans.
- How can I make my birdhouses more inviting? Ensure they are placed in sheltered areas, use natural materials, and clean them out at the end of the season.
- Do I need a large space to create a wildlife habitat? No, even small yards can support wildlife with the right plants and features!
- What should I avoid when creating a wildlife habitat? Avoid using chemical pesticides and fertilizers, as they can harm beneficial insects and wildlife.

Building Birdhouses and Feeders
Creating a welcoming environment for our feathered friends is not just a delightful pastime; it’s a vital step in promoting biodiversity in your backyard. When you build birdhouses and feeders, you're not only adding charm to your garden, but you're also providing essential habitats for birds. Imagine stepping outside to the cheerful chirping of birds flitting about your yard, all thanks to the cozy homes and delicious treats you've provided!
To get started, consider the types of birds that frequent your area. Different species have unique preferences when it comes to nesting and feeding. For example, bluebirds prefer open spaces with low vegetation, while wrens like dense shrubs. By understanding these preferences, you can tailor your birdhouses and feeders to attract specific birds, enhancing your backyard's ecological appeal.
When building birdhouses, it’s essential to focus on the right dimensions and materials. Most birdhouses should be made of untreated wood, such as cedar or pine, which is durable and safe for birds. Here’s a quick reference table to help you with the ideal dimensions for common backyard birds:
| Bird Species | Entrance Hole Diameter | House Dimensions (LxWxH) |
|---|---|---|
| Eastern Bluebird | 1.5 inches | 6"x6"x10" |
| House Wren | 1 inch | 6"x6"x8" |
| Chickadee | 1.25 inches | 6"x6"x8" |
| American Robin | N/A (they prefer open nests) | 12"x12"x12" |
Once you’ve built your birdhouses, consider adding feeders to provide a reliable food source. There are various types of feeders, such as tube feeders for small seeds, platform feeders for a variety of foods, and suet feeders for energy-rich snacks. Each type attracts different species, so you can create a bustling bird buffet in your backyard!
When placing your birdhouses and feeders, think about safety and accessibility. Position them away from potential predators like cats and squirrels, ideally at least 5 to 10 feet off the ground. Additionally, ensure that the feeders are visible from a distance, allowing birds to spot them easily. You might also want to consider placing them near shrubs or trees where birds can seek shelter from predators.
Finally, maintaining your birdhouses and feeders is crucial for their success. Regularly clean them out to prevent the buildup of mold and parasites, and refill feeders frequently, especially during migration seasons when birds are most active. By taking these steps, you’ll create a thriving habitat that not only supports local wildlife but also brings joy to your daily life.
In conclusion, building birdhouses and feeders is a rewarding endeavor that fosters a deeper connection with nature. As you watch the birds come and go, you'll find yourself appreciating the simple beauty of life that surrounds you. So grab your tools, get creative, and start building your backyard sanctuary today!
- What materials are best for building birdhouses? Untreated wood like cedar or pine is ideal, as it is durable and safe for birds.
- How can I attract more birds to my backyard? Provide a variety of feeders, birdhouses, and native plants to create a welcoming environment.
- How often should I clean my birdhouses? It’s best to clean them at least once a year, preferably in the fall, to prepare for new inhabitants in the spring.
- What should I do if I find a baby bird? If it's on the ground, observe from a distance. If it seems abandoned, contact a local wildlife rehabilitator for guidance.

Planting Pollinator Gardens
Creating a pollinator garden is not just a trend; it's a vital step towards supporting our planet's ecosystem. These gardens are specifically designed to attract and sustain pollinators like bees, butterflies, and hummingbirds, which play a crucial role in the reproduction of many flowering plants. Imagine stepping into your backyard and being greeted by the delightful buzz of bees and the fluttering of butterflies. Not only does it beautify your space, but it also contributes to a healthier environment!
So, how do you get started on this exciting journey? First, it’s essential to choose a variety of native plants that bloom at different times throughout the growing season. This ensures that there’s always something flowering to provide food for the pollinators. Native plants are adapted to your local climate, which means they require less water and maintenance, making them perfect for an eco-friendly garden.
Here are some fantastic native plant options to consider:
- Milkweed: Essential for monarch butterflies.
- Bee Balm: Attracts bees and hummingbirds.
- Echinacea (Coneflower): A favorite for various pollinators.
- Black-eyed Susan: Bright and inviting for butterflies.
Moreover, it's not just about the plants; the layout of your garden matters too! Consider creating clusters of flowers rather than scattering them. Pollinators are more likely to visit when they see a dense grouping of the same type of flower. Additionally, you can incorporate features like rocks or logs where insects can rest and bask in the sun. Remember, a little chaos in your garden can be a good thing! Allowing some wildflowers or native grasses to grow can provide essential habitats for pollinators.
Water sources are also crucial. A small birdbath or shallow dish filled with pebbles and water can provide hydration for thirsty pollinators. Just make sure to change the water regularly to keep it fresh and clean. Lastly, be patient! It may take some time for pollinators to discover your garden, but once they do, you'll be amazed at the vibrant life it attracts.
Q: How long does it take for a pollinator garden to attract pollinators?
A: It usually takes a couple of seasons for your garden to fully establish and attract a variety of pollinators. Patience is key!
Q: Do I need to use only native plants?
A: While native plants are highly recommended as they are better adapted to the local environment, you can also include some non-native plants that are known to attract pollinators, as long as they are not invasive.
Q: How can I maintain my pollinator garden?
A: Regular watering, occasional weeding, and avoiding chemical pesticides are essential for maintaining a healthy pollinator garden. Embrace natural pest control methods instead!
By following these tips and creating a pollinator garden, you are taking a significant step towards promoting biodiversity and supporting the delicate balance of our ecosystem. So, roll up your sleeves, dig into the soil, and watch as your backyard transforms into a lively haven for pollinators!

Reducing Chemical Use
Minimizing chemical usage in your backyard is not just a trend; it's a crucial step towards creating an eco-friendly environment. The overuse of synthetic pesticides and fertilizers can lead to soil degradation, water pollution, and harm to beneficial insects. Imagine your backyard as a delicate ecosystem, where every plant, insect, and animal plays a vital role. By reducing chemicals, you're not only protecting this ecosystem but also promoting a healthier space for you and your family.
One effective way to start this journey is by exploring natural alternatives to conventional pesticides. For instance, instead of reaching for that can of insect spray, consider using natural pest control methods. These can include introducing beneficial insects like ladybugs and lacewings, which feast on common pests like aphids. You can also create homemade sprays from ingredients like garlic, chili pepper, or neem oil, which can deter unwanted insects without harming the friendly ones.
Additionally, consider the role of organic fertilizers in enhancing your garden's health. Unlike synthetic fertilizers, organic options enrich the soil with essential nutrients without the harmful additives. They improve soil structure, promote biodiversity, and enhance water retention. Some popular organic fertilizers include compost, manure, and bone meal. By using these, you can ensure your plants receive the nourishment they need while maintaining a safe environment for local wildlife.
To help you understand the differences between chemical and organic options, here's a quick comparison:
| Aspect | Chemical Fertilizers | Organic Fertilizers |
|---|---|---|
| Nutrient Release | Fast release, can lead to nutrient runoff | Slow release, improves soil health over time |
| Impact on Soil | Can degrade soil quality | Enhances soil structure and biodiversity |
| Environmental Impact | Potentially harmful to water sources | Generally safe for ecosystems |
By choosing organic fertilizers, you’re not just feeding your plants; you’re nurturing the entire ecosystem in your backyard. Think of it like giving your garden a wholesome meal instead of fast food—it’s about quality over quantity!
In conclusion, reducing chemical use in your backyard is an essential part of fostering a thriving, eco-friendly space. By embracing natural pest control methods and opting for organic fertilizers, you can create a vibrant garden that supports biodiversity and promotes a healthier environment. So, the next time you're tempted to grab that chemical spray, pause and think about the long-term benefits of going natural. Your backyard—and its inhabitants—will thank you!
- What are some natural pest control methods? Natural pest control methods include introducing beneficial insects, using homemade sprays, and practicing crop rotation.
- How can I start using organic fertilizers? You can start by composting kitchen scraps, using well-rotted manure, or purchasing organic fertilizers from garden centers.
- Are organic fertilizers more expensive than chemical ones? While some organic options may have a higher upfront cost, they often provide long-term benefits to soil health and plant growth, making them more economical in the long run.

Natural Pest Control Methods
When it comes to maintaining a thriving garden, the last thing you want is a swarm of pests wreaking havoc on your plants. But fear not! There are that can help you manage these unwanted visitors without resorting to harmful chemicals. Think of your garden as a delicate ecosystem, where every organism has a role to play. By using natural methods, you can protect your plants while also preserving the balance of nature.
One of the most effective ways to control pests naturally is by introducing beneficial insects into your garden. These little helpers, like ladybugs and lacewings, feast on common pests such as aphids and spider mites. By creating an inviting environment for these beneficial insects, you can significantly reduce pest populations. Consider planting flowers such as marigolds and yarrow, which attract these helpful critters and provide them with a habitat.
Another strategy is to use companion planting, where you plant certain species together that can naturally deter pests. For instance, planting garlic or chives near your roses can help keep aphids at bay. This method not only protects your plants but can also enhance the flavors of your vegetables and herbs, creating a win-win situation for your garden. Here’s a quick look at some effective companion plants:
| Plant | Companion | Pest Deterrent |
|---|---|---|
| Tomatoes | Basil | Whiteflies |
| Carrots | Onions | Carrot flies |
| Cabbage | Mint | Cabbage moths |
Additionally, homemade sprays can be a game-changer in your natural pest control arsenal. A simple mixture of water, soap, and a few drops of essential oils can create a potent spray that targets pests without harming your plants. For example, a soap spray can effectively combat aphids and spider mites. Just mix one tablespoon of liquid soap with a quart of water, shake it up, and spray it directly onto the affected areas. It's a straightforward, eco-friendly solution that can be made right in your kitchen!
Moreover, crop rotation is another essential technique. By changing the location of your plants each season, you can disrupt the life cycles of pests that tend to stay in one area. This method not only helps in pest management but also improves soil health by preventing nutrient depletion.
Lastly, keeping your garden clean is crucial. Regularly removing debris, dead plants, and weeds can help eliminate hiding spots for pests. Consider creating a compost pile for organic waste instead of leaving it in your garden. This not only keeps your space tidy but also enriches your soil over time.
In summary, natural pest control methods are not just effective; they also contribute to a healthier, more sustainable garden environment. By fostering beneficial insects, practicing companion planting, using homemade sprays, rotating crops, and maintaining cleanliness, you can keep your backyard thriving without the use of harsh chemicals. Embrace these natural strategies and watch your garden flourish!
- What are the benefits of using natural pest control methods?
Natural pest control methods are safer for the environment, beneficial insects, and humans. They help maintain the ecological balance in your garden. - How can I attract beneficial insects to my garden?
Planting a variety of flowers, providing shelter, and avoiding pesticides will help attract beneficial insects. - Can homemade pest sprays be harmful to plants?
When used correctly and in moderation, homemade sprays are generally safe. Always test on a small area first to ensure your plants react well.

Organic Fertilizers
When it comes to nurturing your garden, are a game changer. Unlike their synthetic counterparts, organic fertilizers are derived from natural sources, making them a safer choice for the environment and your health. They not only enrich the soil but also improve its structure, enhance moisture retention, and promote beneficial microbial activity. Imagine your garden as a living organism; just like we need balanced nutrition to thrive, so do our plants!
Organic fertilizers come in various forms, each with its unique benefits. For instance, compost, a rich blend of decomposed organic matter, is often considered the gold standard of organic fertilizers. It’s like giving your plants a hearty meal, packed with nutrients. Other popular options include manure, bone meal, and fish emulsion. Each of these sources contributes different nutrients, so understanding what your plants need is crucial.
Here’s a quick breakdown of some common organic fertilizers and their key benefits:
| Type of Organic Fertilizer | Key Nutrients | Benefits |
|---|---|---|
| Compost | Nitrogen, Phosphorus, Potassium | Improves soil structure, moisture retention, and provides a balanced nutrient supply. |
| Manure | Nitrogen, Phosphorus, Potassium | Enhances soil fertility and microbial activity; also improves soil texture. |
| Bone Meal | Phosphorus, Calcium | Promotes strong root development and flowering. |
| Fish Emulsion | Nitrogen, Trace Elements | Quickly available nutrients; excellent for leafy greens and overall plant health. |
Applying organic fertilizers is straightforward. You can mix them into the soil before planting or top-dress your plants during the growing season. Just remember, moderation is key! Over-fertilizing can lead to nutrient runoff, which can harm local waterways. Think of it like seasoning your food; a pinch enhances flavor, but too much can ruin the dish.
Ultimately, using organic fertilizers not only supports the health of your plants but also contributes to a more sustainable gardening practice. By choosing natural options, you’re opting for a greener approach that benefits the ecosystem as a whole. So, the next time you're in the garden aisle, consider reaching for organic options that will make your plants thrive while keeping the planet happy!
- What is the difference between organic and synthetic fertilizers? Organic fertilizers are derived from natural sources, while synthetic fertilizers are chemically manufactured. Organic options improve soil health and are safer for the environment.
- How often should I apply organic fertilizers? It depends on the type of fertilizer and the needs of your plants. Generally, applying every 4-6 weeks during the growing season is a good practice.
- Can I make my own organic fertilizer? Absolutely! You can create your own compost from kitchen scraps and yard waste, or use materials like coffee grounds and eggshells to enrich your soil.
Frequently Asked Questions
- What are the benefits of choosing native plants for my backyard?
Choosing native plants is like inviting your local ecosystem to thrive right in your backyard! These plants are naturally adapted to your area's climate and soil, which means they require less water and maintenance. Plus, they provide essential habitats for local wildlife, promoting biodiversity and creating a balanced ecosystem.
- How can I conserve water in my garden?
Water conservation is crucial, and there are several tricks up your sleeve! Techniques like rainwater harvesting, drip irrigation systems, and creating rain gardens can drastically reduce your water usage while keeping your plants happy and healthy. It’s all about being smart with the water you have!
- What is composting, and why should I start?
Composting is like giving your kitchen scraps a second life! By turning organic waste into nutrient-rich soil, you reduce landfill waste and enrich your garden. It's a win-win situation that makes your plants thrive while being kind to the planet.
- What types of composting are available?
There are several composting methods to choose from, each with its own perks! Traditional composting is great for large amounts of waste, while vermicomposting uses worms to speed up the process. Bokashi composting is a unique method that ferments waste, making it an excellent option for smaller spaces. Find what suits your needs best!
- How can I attract wildlife to my backyard?
Creating a wildlife-friendly backyard is easier than you think! Building birdhouses, installing feeders, and planting pollinator gardens filled with flowers that attract bees and butterflies can turn your space into a haven for local wildlife. It’s like hosting a party for nature!
- What are some natural alternatives to chemical pesticides?
Going natural is the way to go! There are plenty of effective pest control methods that won't harm beneficial insects. For example, introducing ladybugs can help control aphid populations, and using neem oil or insecticidal soap can keep pests at bay without the nasty chemicals.
- What are organic fertilizers, and how do I use them?
Organic fertilizers are the superheroes of the gardening world! They enrich your soil using natural ingredients without the synthetic additives found in conventional fertilizers. You can use compost, manure, or even fish emulsion to give your plants the nutrients they need to flourish. Just remember to follow the application guidelines for the best results!