DIY Eco-Friendly Beauty Products You Should Try
In a world where beauty products often come with a hefty price tag and a laundry list of chemicals, the idea of crafting your own eco-friendly beauty products at home is not just appealing—it's revolutionary! Imagine being able to whip up your own skincare and beauty essentials using simple, natural ingredients that are not only good for your skin but also for the planet. This journey into DIY beauty is like stepping into a magical garden where every ingredient is a gift from nature, waiting to nourish and pamper you.
Whether you're looking to save a few bucks, avoid harsh chemicals, or simply enjoy the creative process of making your own beauty products, there's something incredibly satisfying about knowing exactly what goes into your skincare routine. Plus, you can customize these products to suit your specific needs, whether it’s dry skin, oily skin, or anything in between. It’s like having a personal beauty lab right in your kitchen!
But let’s be real—making your own beauty products may sound a bit daunting at first. However, with just a few basic ingredients and tools, you’ll find that it’s easier than you think. You’ll be amazed at how quickly you can transform your kitchen into a sanctuary of beauty, filled with delightful scents and nourishing concoctions. And the best part? You can make it a fun activity with friends or family, sharing recipes and tips as you go along.
So, are you ready to dive into the world of DIY eco-friendly beauty? From luscious face masks to soothing lip balms, there’s a whole universe of recipes waiting for you. In this article, we’ll explore the benefits of DIY beauty products, essential ingredients you’ll need, and some simple recipes you can try at home. Let’s embark on this exciting journey together!

Benefits of DIY Beauty Products
When it comes to beauty, DIY products are not just a trend; they are a revolution! Imagine crafting your own beauty essentials, tailored specifically to your skin's needs, all while being kind to the planet. The benefits of making your own beauty products are numerous and can significantly enhance your self-care routine. First off, let’s talk about cost savings. Purchasing high-end beauty products can put a dent in your wallet, but when you create them at home, you can save a significant amount of money. Most of the ingredients can be found in your kitchen or at your local grocery store, making it a budget-friendly option.
Another advantage is customization. Everyone's skin is unique, and what works for one person might not work for another. With DIY beauty products, you have the power to experiment and find the perfect blend that suits your skin type. Whether you have oily, dry, or sensitive skin, you can adjust the ingredients to create a formula that caters specifically to your needs. Plus, you can avoid harsh chemicals often found in commercial products, opting instead for natural ingredients that are gentle and nourishing.
Additionally, making your own beauty products promotes environmental consciousness. Many commercial beauty brands use packaging that contributes to plastic waste. By creating your own products, you can use reusable containers, reducing your carbon footprint and helping the planet. Furthermore, the use of natural ingredients means you're not only caring for your skin but also supporting sustainable practices. It's a win-win situation!
Let's not forget about the satisfaction that comes from creating something with your own hands. There’s a certain joy in mixing ingredients, seeing the transformation, and knowing exactly what you’re putting on your skin. It can be therapeutic and a great way to unwind after a long day. Plus, sharing your creations with friends and family can spark conversations about sustainability and self-care, making it a community effort.
In summary, the benefits of DIY beauty products are clear:
- Cost-effective: Save money by using ingredients you already have.
- Customization: Tailor products to meet your specific skin needs.
- Eco-friendly: Reduce waste and use natural ingredients.
- Satisfaction: Enjoy the process of creating and sharing.
So why not give it a try? Your skin, your wallet, and the planet will thank you!

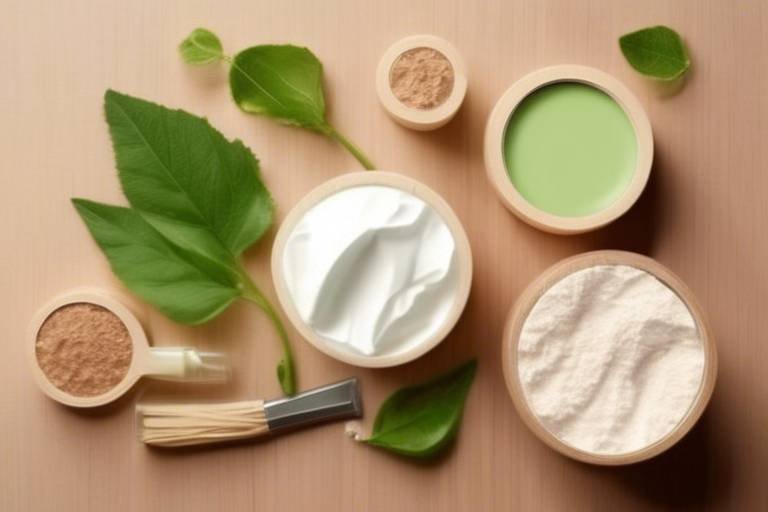
Essential Ingredients for Eco-Friendly Beauty
When it comes to crafting your own beauty products at home, the ingredients you choose play a crucial role in both the effectiveness of the product and its environmental impact. By opting for natural and sustainable ingredients, you not only pamper your skin but also contribute to a healthier planet. So, what should you be looking for? Let's dive into some of the essential components that can elevate your DIY beauty game.
First up, we have natural oils. These oils are not just luxurious; they are packed with vitamins, minerals, and fatty acids that nourish your skin. For instance, coconut oil is a superstar in the DIY community, known for its deep moisturizing properties. It can be used as a base for lotions, scrubs, or even hair masks. Similarly, jojoba oil mimics the skin's natural oils, making it perfect for all skin types, especially for those with oily or acne-prone skin.
Next, let’s talk about butters. Plant-based butters like shea butter and cocoa butter are excellent for creating rich, creamy formulations. These butters are not only deeply hydrating but also help to improve skin elasticity. Imagine slathering on a homemade body butter that melts into your skin, leaving it soft and supple! The best part? You can customize these butters with your favorite essential oils for a personalized scent.
Now, what about natural exfoliants? Exfoliating is key to maintaining a radiant complexion, and you can achieve this without harsh chemicals. Ingredients like coffee grounds, oatmeal, and even sugar can be used to create gentle scrubs that buff away dead skin cells. Not only do they reveal fresh skin, but they also stimulate circulation, giving you that healthy glow we all crave. Just think of it as giving your skin a mini-vacation!
To help you visualize the benefits of these ingredients, here’s a quick table summarizing their properties:
| Ingredient | Benefits | Best For |
|---|---|---|
| Coconut Oil | Moisturizing, antibacterial | Dry skin, hair care |
| Shea Butter | Hydrating, soothing | Sensitive skin, dry patches |
| Coffee Grounds | Exfoliating, stimulating | All skin types |
| Jojoba Oil | Balancing, non-comedogenic | Oily/acne-prone skin |
In summary, the world of DIY beauty is rich with possibilities, and the right ingredients can make all the difference. By choosing natural oils, plant-based butters, and gentle exfoliants, you're not just creating products that are effective; you're also embracing a lifestyle that prioritizes sustainability. So, why not give it a try? Your skin and the environment will thank you!

Natural Oils and Butters
When it comes to crafting your own eco-friendly beauty products, are the stars of the show! These ingredients not only provide exceptional moisture but also bring a host of benefits that can transform your skincare routine. Imagine your skin being enveloped in a warm hug of nourishment, all thanks to the magic of nature. From luscious coconut oil to the rich texture of shea butter, these ingredients are nature’s gift to our beauty regimen.
Natural oils, such as jojoba oil, almond oil, and argan oil, are not just simple moisturizers; they are packed with vitamins and antioxidants that feed your skin. For instance, jojoba oil closely resembles the natural oils produced by our skin, making it an excellent choice for all skin types. It helps maintain moisture balance without clogging pores, making it ideal for those with oily or combination skin. On the other hand, argan oil is rich in vitamin E and fatty acids, making it a powerhouse for hydration and skin repair.
Now, let’s talk about butters. Shea butter and cocoa butter are two of the most popular choices in DIY beauty products. Shea butter is known for its incredible moisturizing properties and is often used in creams and lotions. It’s like a protective barrier for your skin, locking in moisture while soothing dryness and irritation. Cocoa butter, with its delightful chocolate aroma, is not only a fantastic hydrator but also helps improve skin elasticity. It’s often used in formulations for stretch marks and scars, making it a favorite among expectant mothers.
Here’s a quick comparison table to highlight the benefits of some popular natural oils and butters:
| Ingredient | Benefits | Best For |
|---|---|---|
| Coconut Oil | Moisturizing, antimicrobial | Dry skin, hair care |
| Jojoba Oil | Balances oil production | All skin types |
| Shea Butter | Deeply moisturizing, anti-inflammatory | Dry skin, eczema |
| Cocoa Butter | Improves elasticity, hydrates | Stretch marks, scars |
| Argan Oil | Rich in antioxidants, hydrates | Dry skin, anti-aging |
Incorporating these oils and butters into your DIY beauty products not only enhances their effectiveness but also ensures you’re using natural ingredients that are kinder to your skin and the environment. Whether you're making a luscious body butter, a nourishing face mask, or a soothing lip balm, these ingredients will elevate your creations to a whole new level. So, why not dive into the world of natural oils and butters? Your skin will thank you!
Q: Can I use these oils and butters on sensitive skin?
A: Absolutely! However, it’s always best to do a patch test first to ensure there’s no irritation.
Q: How should I store my DIY products made with oils and butters?
A: Store them in a cool, dark place in airtight containers to extend their shelf life.
Q: Can I mix different oils and butters together?
A: Yes! Combining oils and butters can create a customized blend that suits your skin's specific needs.

Carrier Oils
When it comes to DIY beauty products, play a pivotal role that you simply can't overlook. These oils are not just the unsung heroes of your beauty regime; they are the backbone that helps deliver essential nutrients to your skin. Think of them as the delivery trucks that transport all the good stuff from essential oils right to your skin cells. Without them, those potent essential oils would be too strong and could even cause irritation. So, which carrier oils should you consider for your DIY concoctions? Let's break it down!
First off, it's essential to understand that different carrier oils have unique properties, making them suitable for various skin types and concerns. For instance, if you have oily skin, you might want to reach for grapeseed oil. It's lightweight and won’t clog your pores, helping to balance oil production. On the other hand, if your skin is dry or sensitive, jojoba oil or avocado oil can be your best friends. They are rich in fatty acids and provide deep hydration without feeling greasy.
Here’s a quick comparison of some popular carrier oils and their benefits:
| Carrier Oil | Skin Type | Benefits |
|---|---|---|
| Jojoba Oil | All skin types | Moisturizes and balances oil production |
| Coconut Oil | Dry skin | Deeply hydrating and antibacterial |
| Sweet Almond Oil | Normal to dry skin | Rich in vitamins E and A, nourishes and soothes |
| Grapeseed Oil | Oily skin | Lightweight and non-comedogenic |
| Avocado Oil | Dry or mature skin | Rich in vitamins and fatty acids, promotes elasticity |
When blending these oils with essential oils, remember the golden rule: a little goes a long way! Typically, you want to use about 1-2 drops of essential oil per teaspoon of carrier oil. This not only ensures that your skin receives the benefits without overwhelming it with potency but also helps to create a delightful aroma that can elevate your mood. Whether you're crafting a soothing massage oil or a nourishing facial serum, the right carrier oil can make all the difference.
So, the next time you're whipping up your DIY beauty products, don’t forget to consider the magic of carrier oils. They are more than just a base; they are your skin's best allies in achieving that radiant glow while keeping it healthy and happy!
Q: Can I use any oil as a carrier oil?
A: Not all oils are suitable. Carrier oils should be light and non-irritating. Oils like olive oil or castor oil can be too heavy for some skin types.
Q: How do I know which carrier oil is best for my skin type?
A: Consider your skin's needs. Oily skin benefits from lighter oils, while dry skin needs richer, more hydrating options.
Q: Can I mix different carrier oils?
A: Absolutely! Mixing carrier oils can enhance their benefits and create a custom blend that suits your skin perfectly.

Plant-Based Butters
When it comes to DIY beauty products, are like the superheroes of the skincare world. These rich, creamy ingredients not only provide deep hydration but also bring a wealth of nutrients to your skin. Think of them as the nourishing hug your skin has been craving! From shea butter to cocoa butter, these natural wonders can transform your homemade lotions, balms, and scrubs into luxurious treatments.
Shea butter, derived from the nuts of the shea tree, is particularly famous for its moisturizing properties. It’s packed with vitamins A and E, which help to nourish and protect the skin. If you struggle with dryness or irritation, shea butter can be your go-to ingredient. It melts upon contact with the skin, making it easy to apply and absorb. Plus, it’s excellent for soothing conditions like eczema and dermatitis.
Cocoa butter, on the other hand, is a fantastic option if you’re looking for something that not only hydrates but also smells divine! Its rich, chocolatey scent can elevate your beauty routine to a whole new level. This butter is known for its ability to improve skin elasticity, making it a great choice for pregnant women or anyone concerned about stretch marks. Just imagine slathering your skin with a creamy, chocolatey treat that leaves you feeling soft and supple!
Incorporating these butters into your DIY recipes is incredibly simple. For instance, you can create a moisturizing body butter by combining equal parts of shea butter and coconut oil. Melt them together, let the mixture cool slightly, and then whip it until it’s fluffy. Not only will your skin thank you, but you’ll also enjoy a delightful, soothing aroma.
Here’s a quick comparison of two popular plant-based butters:
| Type of Butter | Benefits | Best For |
|---|---|---|
| Shea Butter | Moisturizing, anti-inflammatory, rich in vitamins | Dry skin, eczema, soothing irritation |
| Cocoa Butter | Hydrating, improves elasticity, pleasant scent | Stretch marks, dry skin, soothing and nourishing |
By using plant-based butters in your DIY beauty products, you’re not just pampering yourself; you’re also making a conscious choice for the environment. These ingredients are often sustainably sourced and free from harmful chemicals, which means you can feel good about what you’re putting on your skin. So next time you whip up a batch of homemade lotion or balm, consider adding a scoop of shea or cocoa butter for that extra touch of luxury!
Q: Can I use plant-based butters on all skin types?
A: Yes! Most plant-based butters are suitable for a variety of skin types, but it's always best to do a patch test first, especially if you have sensitive skin.
Q: How do I store my DIY products containing plant-based butters?
A: Store your products in a cool, dark place, preferably in glass containers to maintain their integrity. Avoid exposure to direct sunlight.
Q: Do these butters expire?
A: Yes, plant-based butters can go rancid. Generally, they can last up to a year if stored properly, but always check for any off smells or changes in texture.

Natural Exfoliants
When it comes to achieving that radiant glow, are your best friends. Exfoliation is essential for removing dead skin cells, unclogging pores, and promoting healthy skin turnover. The beauty of using natural ingredients lies not only in their effectiveness but also in their gentleness on the skin. Why settle for harsh chemicals when you can harness the power of nature? Let’s dive into some fantastic options that you can easily incorporate into your DIY beauty routine.
One of the most popular natural exfoliants is sugar. Not only is it readily available in your kitchen, but it also acts as a gentle scrub that can help slough off dead skin cells without causing irritation. The granules dissolve easily, making it perfect for sensitive areas like the face. You can mix sugar with a bit of honey or olive oil to create a luxurious scrub that hydrates while it exfoliates.
Coffee grounds are another fantastic option. They not only provide a coarse texture for exfoliation but also help to improve circulation and reduce the appearance of cellulite when used on the body. The caffeine in coffee can stimulate the skin, leaving it looking firmer and more toned. To make a coffee scrub, simply combine used coffee grounds with coconut oil for a nourishing and invigorating experience.
Don’t overlook oatmeal, either! It’s not just for breakfast; oatmeal is a gentle exfoliant that soothes the skin while effectively removing dead cells. It’s particularly beneficial for those with sensitive or dry skin. You can create a simple oatmeal scrub by grinding oats into a fine powder and mixing them with yogurt or honey. This combination not only exfoliates but also nourishes and hydrates the skin.
Here’s a quick comparison of these natural exfoliants:
| Exfoliant | Benefits | Best For |
|---|---|---|
| Sugar | Gentle scrub, hydrates | All skin types |
| Coffee Grounds | Improves circulation, reduces cellulite | Body scrubs |
| Oatmeal | Soothes, hydrates | Sensitive or dry skin |
Remember, the key to effective exfoliation is moderation. Over-exfoliating can lead to irritation and damage, so it’s best to limit your exfoliation routine to 1-2 times a week. Pair these natural exfoliants with nourishing ingredients for the best results, and your skin will thank you for it!
Q: How often should I exfoliate my skin?
A: It's generally recommended to exfoliate 1-2 times a week, depending on your skin type. Sensitive skin may require less frequent exfoliation.
Q: Can I use these natural exfoliants on my face?
A: Yes! However, be cautious with the coarseness of the exfoliant. Sugar and oatmeal are great for facial scrubs, while coffee grounds are better suited for body scrubs.
Q: How do I store homemade scrubs?
A: Store your scrubs in airtight containers in a cool, dry place. Make sure to use them within a few weeks to ensure freshness.

Simple DIY Recipes to Try
Are you ready to dive into the world of DIY beauty? Creating your own eco-friendly beauty products is not only a fun and rewarding experience, but it also allows you to take control of what goes on your skin. Imagine whipping up your own nourishing face masks or lip balms right in your kitchen! It’s like being a mad scientist, but instead of potions, you’re concocting beauty elixirs. Let’s explore some simple yet effective recipes that you can easily try at home, using ingredients that are likely already in your pantry.
First up, let’s talk about homemade face masks. These masks are perfect for giving your skin a boost of hydration and nutrients. One of the simplest recipes involves using just three ingredients: honey, avocado, and yogurt. Honey is a natural humectant, meaning it draws moisture into your skin, while avocado is packed with healthy fats that nourish and hydrate. Yogurt contains lactic acid, which gently exfoliates and brightens your complexion. To create this mask, simply mash half an avocado, mix in a tablespoon of honey and a tablespoon of yogurt, and apply it to your face for about 15-20 minutes before rinsing off. Your skin will feel rejuvenated and fresh!
Next, let’s move on to natural lip balms. If you’ve ever experienced dry, chapped lips, you know how important it is to keep them hydrated. Making your own lip balm is incredibly easy and allows you to avoid all those synthetic additives found in store-bought products. For a simple recipe, you’ll need beeswax, coconut oil, and your choice of essential oils for fragrance. Start by melting one tablespoon of beeswax and one tablespoon of coconut oil together in a double boiler. Once melted, remove from heat and add a few drops of your favorite essential oil, like peppermint or lavender, for a soothing scent. Pour the mixture into small containers and let it cool. Voila! You have your very own lip balm that keeps your lips soft and moisturized.
Now, you might be wondering how to store these fabulous creations. Proper storage is essential to maintain the effectiveness of your DIY products. When it comes to containers, consider using glass jars or metal tins, as they are more sustainable and help preserve the integrity of your products. Avoid plastic containers, as they can leach chemicals into your beauty products over time. Additionally, always label your creations with the date you made them, so you can keep track of their freshness.
As for shelf life, most homemade beauty products can last anywhere from a few weeks to a couple of months, depending on the ingredients used. To ensure your products remain safe and effective, always check for signs of spoilage. If you notice any changes in color, texture, or smell, it’s best to discard the product and whip up a fresh batch. Remember, the beauty of DIY is that you can always make more!
Q: How do I know if my DIY beauty products are safe to use?
A: Always check for signs of spoilage, such as changes in color, texture, or smell. If anything seems off, it’s best to err on the side of caution and discard the product.
Q: Can I customize these recipes for my skin type?
A: Absolutely! Feel free to adjust the ingredients based on your skin’s needs. For example, if you have oily skin, consider adding ingredients like lemon juice or tea tree oil to your masks.
Q: How can I make my DIY products smell better?
A: Adding essential oils is a great way to enhance the fragrance of your DIY beauty products. Just a few drops can make a world of difference!

Homemade Face Masks
Are you tired of spending a fortune on store-bought face masks that are packed with chemicals and artificial fragrances? Well, it’s time to roll up your sleeves and dive into the world of ! Not only are these DIY masks incredibly easy to whip up, but they also allow you to harness the power of natural ingredients that are gentle on your skin and the environment. Imagine treating your skin with the same love and care you would give to a cherished friend—sounds delightful, right?
One of the most popular ingredients in homemade face masks is honey. This golden nectar isn’t just for your tea; it’s a natural humectant, meaning it draws moisture into your skin. Pair it with avocado, which is rich in healthy fats and vitamins, and you’ve got a powerhouse mask that hydrates and nourishes. Simply mash half an avocado and mix it with a tablespoon of honey for a creamy, revitalizing treat that will leave your skin feeling soft and supple.
Another fantastic option is a yogurt-based mask. Yogurt contains lactic acid, which gently exfoliates and brightens your complexion. You can create a simple yet effective mask by combining two tablespoons of plain yogurt with a teaspoon of honey and a sprinkle of turmeric for an added glow. The result? A refreshing mask that not only hydrates but also helps to reduce inflammation and redness.
For those who love a little extra exfoliation, consider using a coffee grounds mask. Not only does it smell divine, but coffee grounds are also excellent for sloughing off dead skin cells. Mix a tablespoon of coffee grounds with a tablespoon of coconut oil and a dash of brown sugar for a scrub that doubles as a mask. Apply it to your face, let it sit for about 10 minutes, and then gently scrub it off in circular motions. Your skin will feel rejuvenated and radiant!
Feeling adventurous? You can also experiment with other natural ingredients. Here are a few ideas to get your creative juices flowing:
- Banana: Mash a ripe banana and mix it with a tablespoon of honey for a nourishing mask that hydrates and fights acne.
- Cucumber: Blend half a cucumber and combine it with yogurt for a cooling mask that soothes irritated skin.
- Oatmeal: Mix ground oatmeal with water or milk to create a soothing mask that’s perfect for sensitive skin.
Remember, the key to a successful homemade face mask is to tailor it to your specific skin needs. Whether you’re battling dryness, oiliness, or just want to pamper yourself, there’s a natural solution waiting for you in your kitchen. So, grab those ingredients, get mixing, and let your skin indulge in the goodness of nature!
Q: How often can I use homemade face masks?
A: It depends on your skin type, but generally, 1-2 times a week is a good frequency to maintain healthy skin without overdoing it.
Q: Can I store leftover face mask ingredients?
A: It's best to use fresh ingredients for each mask. However, if you have leftover mixtures, store them in an airtight container in the refrigerator and use them within a couple of days.
Q: Are homemade face masks suitable for all skin types?
A: Most homemade masks can be customized for different skin types, but it’s always a good idea to do a patch test first to ensure you don’t have any adverse reactions.

Natural Lip Balms
Creating your own is not just a fun DIY project; it’s a fantastic way to ensure your lips stay soft, hydrated, and free from harmful chemicals. Many commercial lip balms are packed with synthetic ingredients that can lead to irritation or dryness. By making your own, you can control what goes into your product, using only the best natural ingredients that are beneficial for your skin.
To start, you’ll need a few basic ingredients that are probably already in your kitchen or easily accessible. The key components include beeswax, which acts as a natural thickener and provides a protective barrier on your lips, and coconut oil, known for its moisturizing properties. Essential oils can be added for fragrance and additional benefits, and you can even incorporate natural flavorings to make your lip balm uniquely yours.
Here’s a simple recipe to get you started:
| Ingredient | Amount |
|---|---|
| Beeswax | 1 tablespoon |
| Coconut Oil | 1 tablespoon |
| Shea Butter | 1 tablespoon |
| Essential Oils (e.g., peppermint, lavender) | 5-10 drops |
To make your lip balm, simply melt the beeswax, coconut oil, and shea butter together in a double boiler. Once fully melted, remove it from heat and add your chosen essential oils. Pour the mixture into small containers or tubes and allow it to cool and solidify. Voila! You have yourself a nourishing, homemade lip balm that not only feels good but is also good for you.
One of the best parts about making your own lip balm is the ability to customize it to your liking. You can experiment with different oils, butters, and scents. For instance, if you prefer a sweeter flavor, consider adding a drop of vanilla extract or a touch of honey. The possibilities are endless, and you can tailor your lip balm to suit your personal preferences.
Moreover, using natural lip balms can be particularly beneficial during harsh weather conditions. In the winter, the cold air can dry out your lips, while summer sun can lead to chapping. With your homemade balm, you can keep your lips protected and moisturized, no matter the season. Plus, you can feel good knowing that you’re using eco-friendly ingredients that are safe for both you and the environment.
In conclusion, making your own is an excellent way to indulge in self-care while also being mindful of what you put on your skin. It’s a simple process that yields amazing results, and once you try it, you might never go back to store-bought options again!
Q: How long will my homemade lip balm last?
A: Typically, homemade lip balms can last up to six months if stored in a cool, dry place. However, it’s always best to check for any changes in smell or texture before use.
Q: Can I use other oils instead of coconut oil?
A: Absolutely! You can substitute coconut oil with other oils like sweet almond oil or olive oil, depending on your preference and skin type.
Q: Is it safe to use essential oils in lip balm?
A: Yes, most essential oils are safe for topical use when diluted properly. However, it’s important to do a patch test first to ensure you don’t have any adverse reactions.

Storing and Preserving Your DIY Products
When you've put in the effort to create your own eco-friendly beauty products, it's crucial to ensure they remain effective and safe for use. Proper storage and preservation can significantly extend the life of your homemade creations, allowing you to enjoy their benefits for a longer time. So, what are the best practices for storing these natural wonders? First and foremost, consider the containers you choose. Opt for dark glass or opaque containers, as they help shield your products from light, which can degrade certain ingredients over time. Plastic containers are generally less desirable due to potential chemical leaching, especially when exposed to heat or sunlight.
Another key factor is the environment in which you store your DIY beauty products. A cool, dry place is ideal, as humidity and heat can promote the growth of bacteria and mold. For instance, your bathroom may seem like a convenient spot, but it often experiences fluctuations in temperature and moisture that aren't ideal for your creations. Instead, consider a cupboard or drawer in a cooler part of your home.
Now, let’s talk about shelf life. Different ingredients have varying lifespans, and it's important to keep track of how long your products will last. For example, while a simple sugar scrub may last several months, a face mask containing fresh ingredients like avocado or yogurt should be used within a week to ensure safety and efficacy. To help you keep track, here’s a simple table outlining the typical shelf life of common DIY beauty products:
| Product Type | Shelf Life | Storage Tips |
|---|---|---|
| Face Masks | 1 week | Refrigerate and use within a week |
| Body Scrubs | 3-6 months | Store in a cool, dry place |
| Lip Balms | 6-12 months | Keep in a cool, dark place |
| Lotions | 3-6 months | Use dark glass containers to prolong life |
Additionally, always check for signs of spoilage before using your products. If you notice any changes in color, texture, or smell, it's best to err on the side of caution and dispose of the product. Remember, natural ingredients are less stable than their commercial counterparts, which often contain preservatives. By being vigilant and practicing good storage habits, you can enjoy your DIY beauty products safely and effectively.
Q: How can I tell if my DIY beauty product has gone bad?
A: Look for changes in color, texture, or smell. If anything seems off, it's safer to discard the product.
Q: Do I need to refrigerate all my DIY products?
A: Not all, but products with fresh ingredients like fruits or dairy should be refrigerated to prevent spoilage.
Q: Can I use plastic containers for my DIY beauty products?
A: While it's possible, opt for glass or metal whenever you can, as they are more stable and less likely to leach chemicals.

Choosing the Right Containers
When it comes to storing your homemade beauty products, is crucial for maintaining their integrity and effectiveness. You might not think much about the jar or bottle you use, but trust me, it can make a world of difference. Imagine putting all that effort into crafting a luxurious face mask, only to have it spoil because of a poorly chosen container! So, what should you look for?
First and foremost, consider the material of the container. Glass is often the best choice because it is non-reactive and doesn’t leach chemicals into your products. Plus, it gives your DIY creations a beautiful, artisanal look. However, if you’re concerned about breakage, high-quality plastic can also be a good option, just make sure it’s BPA-free. In addition to material, think about the size of the container. It’s wise to choose sizes that match your usage frequency. If you’re making a large batch of lip balm, you might want to opt for a bigger container, but if it’s a one-time face mask, a smaller jar will do.
Another important factor is the seal. Airtight containers are essential for preventing air exposure, which can lead to oxidation and spoilage. For instance, if you’re making a nourishing body butter, you’d want a container that seals tightly to keep it fresh for as long as possible. You might also want to consider using dark glass containers, like amber or cobalt blue, which can protect sensitive ingredients from light degradation.
Here’s a quick rundown of container types that work well for DIY beauty products:
- Glass Jars: Ideal for creams, balms, and masks.
- Plastic Bottles: Great for liquids like toners or sprays, just ensure they’re BPA-free.
- Roller Bottles: Perfect for serums or oils, allowing for easy application.
- Metal Tins: Excellent for solid products like lip balms or salves.
Finally, don’t forget about labeling your containers! It’s easy to forget what’s what after a few weeks, so a simple label with the product name and date made can save you a lot of confusion later on. You can use washi tape or printable labels for a personalized touch. By putting a little thought into your container choices, you can ensure that your DIY beauty products remain effective and enjoyable to use.
Q: Can I use any container for my DIY beauty products?
A: Not all containers are suitable. It’s important to choose materials that are non-reactive and can maintain the product's integrity, such as glass or BPA-free plastic.
Q: How do I know if my container is airtight?
A: An airtight container will have a secure lid that doesn’t allow air to enter. You can test it by checking for any gaps or using water displacement methods.
Q: How long can I store my homemade beauty products?
A: It depends on the ingredients used, but generally, products stored in proper containers can last from a few weeks to several months. Always check for signs of spoilage.
Q: Should I keep my products in the fridge?
A: Some products, especially those with natural preservatives or fresh ingredients, may benefit from refrigeration, while others can be stored at room temperature. Always check the specific recommendations for your product.

Expiration Dates and Signs of Spoilage
When it comes to DIY beauty products, understanding expiration dates and signs of spoilage is crucial for maintaining the safety and effectiveness of your creations. Unlike commercial products that often contain preservatives, your homemade beauty items are more susceptible to degradation over time. This means you need to be vigilant about how you store them and how long you keep them. So, how do you know when it's time to toss that jar of homemade face mask or lip balm?
First off, it’s essential to establish a general guideline for expiration dates. Most DIY beauty products, especially those that contain water or fresh ingredients, should ideally be used within 1 to 3 months. However, products that are oil-based or contain ingredients like beeswax may last longer—up to 6 months or even a year—if stored properly. To help you keep track, you might consider labeling your containers with the date they were made. This simple practice can save you from using something that could potentially harm your skin.
Now, let’s dive into some common signs of spoilage to watch out for:
- Change in Color: If your once vibrant face mask has turned a dull shade or has darkened significantly, it’s a red flag.
- Unpleasant Odor: A sour or rancid smell is a sure sign that your product has gone bad. Trust your nose!
- Texture Changes: If your lotion has separated or your scrub feels grainy instead of smooth, it’s best to discard it.
- Mold Growth: Any visible mold is a definite no-go. If you see it, throw it out immediately!
Being proactive about the shelf life of your DIY beauty products not only ensures that you are using safe formulations but also helps you enjoy the best results. To further extend the life of your creations, consider storing them in a cool, dark place, away from direct sunlight. Additionally, using clean utensils when scooping out your product can help prevent contamination.
In summary, while making your own beauty products can be a fun and rewarding experience, it comes with the responsibility of ensuring they remain safe to use. By keeping an eye on expiration dates and recognizing signs of spoilage, you can continue to enjoy your eco-friendly beauty routine without worry.
Q: How can I tell if my homemade beauty product is still good to use?
A: Look for changes in color, texture, and smell. If anything seems off, it's best to err on the side of caution and discard it.
Q: What is the best way to store my DIY beauty products?
A: Store them in a cool, dark place and use airtight containers to minimize exposure to air and moisture.
Q: Can I use preservatives in my DIY products to extend their shelf life?
A: Yes, natural preservatives like vitamin E oil or rosemary extract can help prolong the life of your products without compromising their eco-friendly nature.
Frequently Asked Questions
- What are the benefits of making my own beauty products?
Creating your own beauty products can save you money, provide customization options, and ensure you're using natural ingredients that are better for your skin and the environment. Plus, there’s something incredibly satisfying about crafting your own lotions and potions!
- What essential ingredients should I have for DIY beauty products?
Key ingredients for your DIY beauty arsenal include natural oils like coconut oil and jojoba oil, plant-based butters such as shea butter, and natural exfoliants like sugar or coffee grounds. These ingredients not only nourish your skin but also help you avoid harmful chemicals.
- How do I know which carrier oils to use?
Carrier oils are crucial because they dilute essential oils and help them penetrate the skin. For dry skin, oils like avocado or almond oil work wonders, while oily skin types might prefer jojoba or grapeseed oil, which can help balance oil production.
- Can I use food items in my beauty recipes?
Absolutely! Ingredients like honey, yogurt, and avocado are not only safe but also packed with nutrients that benefit your skin. Just make sure they are fresh and suitable for your skin type!
- How should I store my homemade beauty products?
Store your DIY products in clean, dry containers made from glass or BPA-free plastic. Keep them in a cool, dark place to prolong their shelf life and effectiveness. Remember, light and heat can degrade natural ingredients.
- What are the signs that my DIY beauty products have gone bad?
Look for changes in smell, texture, or color. If your product develops an off odor or a strange consistency, it’s best to toss it out. Always trust your senses—if it doesn’t look or smell right, it probably isn’t!
- How long do homemade beauty products last?
Generally, the shelf life of DIY beauty products can range from a few weeks to several months, depending on the ingredients used. Products without preservatives will typically last shorter, so always check for freshness before use.
- Are there any precautions I should take when making DIY beauty products?
Yes! Always perform a patch test with new ingredients to ensure you don’t have any allergic reactions. Additionally, use clean utensils and containers to prevent contamination.